
中文
English
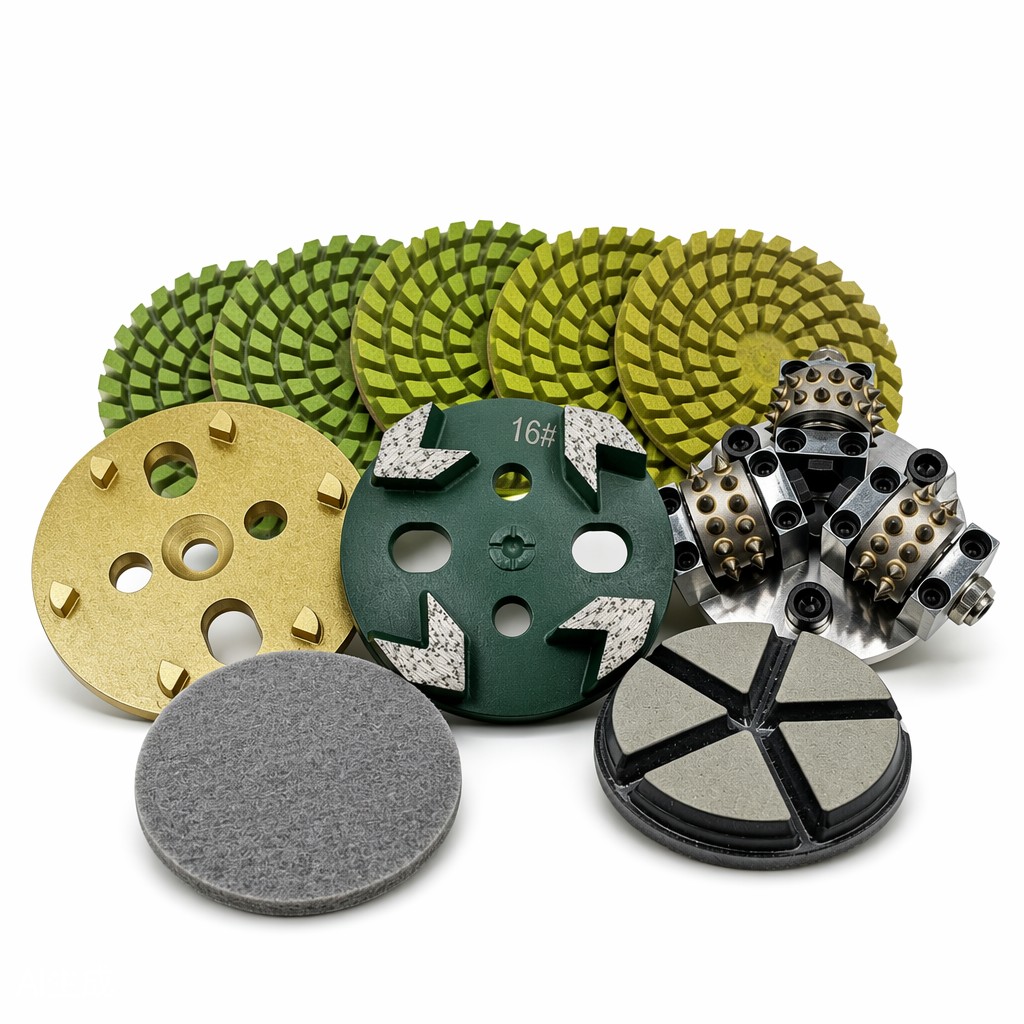
Your diamond polishing pads are the single most important consumable in your concrete and stone finishing operation. Choose the wrong pad—wrong bond, wrong grit, wrong backing—and you'll waste hours on rework, burn through pads at twice the expected rate, and deliver a finish that doesn't meet spec. Get the selection right, and you'll achieve consistent, high-gloss results with fewer pad changes, lower consumable costs, and faster project completion. This complete diamond polishing pads guide covers everything you need to know: bond types, grit sequences, material matching, proper technique, lifespan extension, and troubleshooting. Whether you're a seasoned pro or just getting into concrete polishing, this guide will help you select and use diamond pads like an expert.
In the concrete and stone polishing business, your diamond pads are where the rubber meets the road—literally. Everything else—the grinder, the operator, the densifier—supports what the diamond pads do. The pads are the cutting edge that transforms rough, porous concrete or raw stone into a smooth, reflective, professional-grade finish. Get your pad selection wrong, and no amount of expensive equipment or operator skill can compensate for poor results.
Yet many flooring contractors treat diamond polishing pads as a commodity—buying the cheapest available and wondering why their finishes are inconsistent, their pads wear out in half the expected time, and their jobs run over budget. The truth is, not all diamond pads are created equal. Differences in diamond concentration, bond hardness, backing quality, and manufacturing consistency can have an enormous impact on performance, cost per square foot, and finish quality.
This guide is designed to give you a comprehensive understanding of how diamond polishing pads work, how to select the right ones for any job, and how to use them to get the best possible results at the lowest possible cost. We'll cover everything from basic pad anatomy to advanced grit sequencing techniques, from bond hardness matching to lifespan optimization strategies.
At YUMEIGU, we manufacture professional-grade diamond polishing pads and grinding segments for concrete and stone applications, supplying contractors in 80+ countries around the world. We've designed this guide based on both our manufacturing expertise and our field experience with customers who use our pads every day. Whether you're a one-person operation or a large flooring company, the principles in this guide will help you achieve better results with lower consumable costs.
Diamond polishing pads are abrasive discs embedded with synthetic industrial diamond particles, designed to grind, hone, and polish hard surfaces like concrete, granite, marble, terrazzo, and engineered stone. They are the essential consumable tool used with floor grinders, handheld polishers, and planetary grinding machines across the flooring and stone fabrication industries.
Understanding the structure of a diamond pad helps you make better buying decisions and diagnose problems:
Diamond polishing is a micro-abrasion process. When the pad rotates against the surface under pressure, the exposed diamond particles act like tiny cutting tools, scraping off microscopic amounts of material. As the diamonds wear down and become dull, the bond matrix also wears away (at a controlled rate), exposing fresh, sharp diamond particles. This continuous cycle of exposure, cutting, wear, and re-exposure is what gives diamond pads their long working life and consistent cutting performance (AliExpress / DT-DIATOOL).
The key principle is that the bond must wear at the correct rate for the material being polished. If the bond is too hard for the material, the diamonds dull but don't fall out, and the pad "glazes"—stops cutting effectively. If the bond is too soft, the diamonds fall out before they're fully worn, wasting expensive diamond abrasive and shortening pad life dramatically. This is why matching bond hardness to material hardness is the single most important factor in pad selection.
Diamond pad grit sizes follow the same convention as sandpaper: lower numbers mean coarser abrasives that remove material faster, while higher numbers mean finer abrasives that produce smoother finishes. But unlike sandpaper, diamond pads don't wear down to finer grits—each grit is a separate pad with consistently sized diamond particles. You progress through grit stages sequentially, starting coarse and working your way up to finer and finer grits, until you achieve the desired level of smoothness and gloss.
The standard grit sequence for full concrete polishing runs from 30 grit (very coarse, heavy material removal) up to 3000 grit (extremely fine, mirror-gloss finish), with intermediate stages at 50, 100, 200, 400, 800, and 1500 grit (Diamond Pads Factory).
Diamond polishing pads are classified primarily by their bond type—the material that holds the diamond particles. The three main bond types are metal bond, resin bond, and hybrid/transition bonds. Each has distinct characteristics and is designed for specific stages of the polishing process.
Metal bond pads use a sintered metal alloy (usually a copper-tin or cobalt-based matrix) to hold the diamond particles. They are the most aggressive type of diamond tool and are used for the early, heavy-material-removal stages of grinding and leveling.
Strengths:
Limitations:
Metal bond pads are typically used from 30 grit up to 120 or 200 grit for concrete preparation and initial grinding stages. Beyond that, you switch to resin bond pads for finer finishes (Blade Runner Diamond Tools, 2026).
Resin bond pads use a thermosetting polymer resin matrix to hold the diamond particles. The resin is softer and more flexible than metal, which allows for finer scratch patterns and better finish quality. Resin bond pads are the workhorses of the polishing stage, used from 200 grit up through 3000 grit and beyond for high-gloss, mirror-like finishes (AliExpress / DT-DIATOOL).
Strengths:
Limitations:
For contractors aiming for professional-grade finishes on concrete or stone, switching from metal-bond to resin-bond pads at the 200–400 grit stage is essential. Resin-bond pads are what actually create the glossy, reflective surface that clients expect from polished concrete (AliExpress / DT-DIATOOL).
Hybrid or transitional diamond pads bridge the gap between metal bond and resin bond stages. They typically combine a harder base with a softer working layer, or use a ceramic bond that sits between metal and resin in hardness. These pads are designed for the 100–400 grit range where you're transitioning from aggressive grinding to fine polishing.
Benefits:
Some contractors swear by transitional pads for their efficiency, while others prefer to stick with a full metal-to-resin progression. The best approach depends on your specific equipment, the concrete hardness, and the finish quality you're targeting.
The grit sequence is the step-by-step progression of diamond pad grit sizes you use to go from a rough, raw surface to a polished finish. Getting the sequence right is critical—skip a grit, and you'll leave deep scratches that show through every subsequent step, forcing you to go back and rework the floor.
Here's the complete grit sequence used in professional concrete polishing, along with what each stage accomplishes:
| Grit Range | Stage Name | Bond Type | Purpose | Surface Appearance |
|---|---|---|---|---|
| 16–30 grit | Heavy Grinding / Coarse Grind | Metal bond | Material removal, coating removal, floor leveling, exposing aggregate | Very rough, deep scratch patterns, matte |
| 50–80 grit | Medium Grinding | Metal bond | Removing coarse scratch pattern, initial flattening, surface refinement | Rough, visible scratches, uniform texture |
| 100–200 grit | Fine Grinding / Transition | Metal or hybrid | Final metal-bond refinement, preparing for resin stages | Smoother, finer scratches, honed appearance |
| 400 grit | Honing | Resin or hybrid | Coarse polishing, scratch removal, densifier application point | Satin sheen, very fine scratches, starting to reflect |
| 800 grit | Polishing | Resin bond | Medium polishing, gloss development, refining surface | Glossy, clear reflections, smooth texture |
| 1500 grit | Fine Polishing | Resin bond | Fine surface refinement, high gloss development | High gloss, sharp reflections, near-mirror |
| 3000+ grit | Finishing / Mirror Polish | Resin bond | Final mirror-like finish, maximum gloss | Mirror finish, crisp reflections, glass-smooth |
Sources: Diamond Pads Factory, AliExpress / DT-DIATOOL
Not every job requires the full 7+ grit progression. The number of steps depends on the starting condition and the desired finish:
Full progression (premium finish): 30 → 50 → 100 → 200 → 400 → 800 → 1500 → 3000 grit (8 steps). Used for high-end residential, showrooms, and luxury retail where a flawless mirror finish is required. Produces the best possible results but takes the longest and consumes the most pads.
Standard progression (commercial finish): 30 → 100 → 400 → 800 → 1500 grit (5 steps). The most common sequence for commercial concrete polishing. Skipping every other grit works because modern diamond pads cut efficiently and remove the previous scratch pattern effectively.
3-step system (basic finish): 50 → 400 → 3000 grit (3 steps). Used for budget projects or maintenance polishing where time is critical. The 3-step system is faster and uses fewer pads but may not achieve the same depth of gloss or scratch-free perfection as a fuller progression (Diamond Pads Factory).
Industry rule of thumb: You should never skip more than one grit level at a time. Going from 100 grit directly to 400 grit is possible (skipping 200) because the 400 grit resin pad is aggressive enough to remove the 100 grit metal-bond scratches. But jumping from 50 grit to 800 grit (skipping three steps) will almost certainly leave visible scratch patterns that ruin the final finish (Diamond Pads Factory).
The #1 mistake that causes rework is advancing to the next grit before the previous scratch pattern is fully removed. The best way to check is with a "raking light"—shine a bright flashlight at a low angle across the floor. This side-lighting reveals even the faintest scratches that wouldn't be visible from overhead. If you can see scratches from the previous grit, you're not ready to advance (Diamond Pads Factory).
Make this inspection mandatory between every grit stage. It adds 5 minutes per step but saves hours of rework later. One factory we work with reports that implementing mandatory raking light inspections eliminated 90% of their rework calls.
For polished concrete, the densifier (hardener) should be applied after the 400-grit stage (or whatever your final metal-bond or first resin stage is). At this point, the concrete is porous enough for the densifier to penetrate deeply, but smooth enough that you're not wasting product on a rough surface. Allow the densifier to cure fully (typically overnight or as directed by the manufacturer) before continuing to higher grits (Diamond Pads Factory). The densifier hardens the concrete, which improves the final polish and makes the surface more durable.
Selecting the right diamond polishing pads depends on four key factors: the material you're polishing, the starting condition of the surface, the desired finish, and your equipment. Here's a systematic approach.
This is the most important principle in diamond pad selection, and also the one most often misunderstood. The rule is:
Hard material → soft bond
Soft material → hard bond
Here's why: On hard concrete or hard stone, the material wears away the bond matrix slowly. If you use a hard bond on hard material, the diamonds dull but the bond doesn't wear fast enough to expose fresh diamonds. The pad "glazes over" and stops cutting effectively. You need a softer bond that wears faster, constantly exposing new sharp diamonds.
On soft concrete or soft stone, the material is abrasive and wears the bond away quickly. If you use a soft bond on soft material, the diamonds fall out before they're fully used, wasting expensive diamond abrasive. A harder bond holds the diamonds longer, giving you more cutting life per pad (DeFusco Industrial Supply).
This principle is so important that professional diamond tool manufacturers offer their pads in multiple bond hardnesses—soft, medium, and hard—specifically so you can match the pad to the concrete or stone hardness.
| Material | Mohs Hardness | Recommended Bond | Starting Grit |
|---|---|---|---|
| Hard concrete / quartzite | 7–8 | Soft bond | 30–50 grit metal |
| Medium concrete / granite | 6–7 | Medium bond | 30–50 grit metal |
| Soft concrete / engineered quartz | 5–6 | Hard bond | 50–100 grit metal |
| Marble / limestone / travertine | 3–4 | Hard resin bond | 100–200 grit |
Source: Diamond Pads Factory
Pro tip: When in doubt about bond hardness, go softer. A bond that is too hard will glaze immediately and produce no results at all. A bond that is slightly too soft will still cut—you'll just go through pads faster. It's better to spend a little more on pads than to waste time with glazed, non-cutting tooling (Diamond Pads Factory).
Before every new job, you should test the concrete hardness to select the right bond. Here's how:
The starting condition of your floor determines what grit to begin with:
Use the "fingernail test" to gauge where to start: If your fingernail catches in scratches, start at 50–100 grit. If you feel texture but no catching, start at 200–400 grit. If the surface is smooth but just dull, start at 400–800 grit (Diamond Pads Factory).
How far you progress through the grit sequence depends on the finish you're trying to achieve:
Note that going from 1500 to 3000 grit adds significant time and pad cost but increases measured gloss units (GU) by only 15–25% on most materials. For many commercial applications, 800–1500 grit provides the best balance of appearance and cost (Diamond Pads Factory).
Make sure your pads are compatible with your equipment:
Concrete is the most common material polished with diamond pads, and it has its own set of considerations due to its variable composition, hardness, and aggregate content.
Not all concrete is the same, and the composition dramatically affects polishing results and pad selection:
Here's a complete pad selection guide for a standard polished concrete floor:
Stage 1: Coarse Grinding (30–50 grit, metal bond)
Use the coarsest metal-bond diamond tooling appropriate for your starting condition. This stage removes the most material and establishes the floor's flatness and aggregate exposure level. Use PCD scrapers first if there are existing coatings or adhesives to remove. Soft bond for hard concrete, hard bond for soft concrete (DeFusco Industrial Supply).
Stage 2: Medium Grinding (100–200 grit, metal bond)
Progress through intermediate metal-bond grits to refine the scratch pattern from the coarse grinding stage. By 100–200 grit, the floor should have a uniform, honed appearance with no visible deep scratches. This is typically the last metal-bond stage before switching to resin.
Stage 3: Honing (400 grit, resin or hybrid bond)
Switch to resin-bond pads (or hybrid transitional pads) at the 200–400 grit stage. This is when the floor starts to develop a sheen and the surface becomes noticeably smoother. Apply concrete densifier after the 400 grit stage and allow it to cure fully before proceeding (Diamond Pads Factory).
Stage 4: Polishing (800–1500 grit, resin bond)
Continue through finer resin grits to develop gloss and reflectivity. At 800 grit, the floor should have a clear glossy appearance with distinct reflections of overhead lights. At 1500 grit, reflections are sharp and the floor has a deep sheen.
Stage 5: Finishing (3000+ grit, resin bond)
The final stage for premium "wet-look" polished concrete. At 3000 grit, the floor has a mirror-like finish with crisp reflections. Some contractors follow this with a buffing pad and polishing compound for maximum gloss.
While the basic principles of diamond polishing apply to all materials, different types of natural stone have specific characteristics that require different pad selection and technique.
Granite is a hard, igneous rock (Mohs 6–7) that polishes to a very high gloss. It's the most common stone countertop material and also used for floors and cladding.
Pad selection:
Dark granites (like Black Galaxy) show every tiny scratch, so they require more careful grit progression and benefit from the full 7-step sequence. Lighter granites are more forgiving. Quartzite (Mohs 7–8) is even harder than granite and requires very soft bonds (Diamond Pads Factory).
Marble is a soft metamorphic rock (Mohs 3–4) composed primarily of calcite. It polishes beautifully but scratches easily and is sensitive to acidic substances.
Pad selection:
Marble is prone to "orange peel" texture if you use too much pressure or pads that are too stiff. Use flexible pads and lighter pressure on marble (Diamond Pads Factory).
Terrazzo is a composite material made of marble, granite, or glass chips set in a cementitious or epoxy binder. It polishes to a very high gloss and is popular for commercial floors.
Pad selection:
Engineered quartz (Caesarstone, Silestone, etc.) is a man-made material consisting of 90–95% quartz aggregate bound in resin. It's harder than marble but softer than most granite.
Pad selection:
Diamond polishing can be done either wet (with water) or dry (without water, with dust extraction). Each method has advantages and disadvantages, and the choice depends on your application, environment, and equipment.
| Factor | Wet Polishing | Dry Polishing |
|---|---|---|
| Gloss quality | Highest—water cools and lubricates | Good, but rarely matches wet finish |
| Pad life | Longer (water cooling prevents heat damage) | Shorter (40–70% of wet pad life) |
| Dust control | None—slurry instead | Requires HEPA vacuum + respirator |
| Mess | Slurry—contained but messy | Dust—requires extensive containment |
| Convenience | Needs water source and drainage | No water needed—more portable |
| Best for | Shop fabrication, premium finishes, indoor slabs with drainage | On-site work, outdoor jobs, quick touch-ups |
Source: Diamond Pads Factory
Wet polishing uses water to lubricate the pad, cool the surface, and carry away swarf (ground material). It produces the best possible finish and the longest pad life. The water also prevents silica dust from becoming airborne, which is a major health and safety benefit (Diamond Pads Factory).
The downside is slurry management—the mix of water and concrete/stone dust must be contained and properly disposed of. On indoor jobs without floor drains, slurry management can be complex and time-consuming. On outdoor jobs or slabs with proper drainage, wet polishing is usually the preferred method.
Dry polishing uses no water—instead, dust is collected by a HEPA-filtered vacuum attached to the grinder. This method is more convenient for on-site work, especially where water isn't available or would create a mess (Diamond Pads Factory).
However, dry polishing has significant drawbacks: it generates silica dust (a serious health hazard), pads wear faster because of heat buildup, and the finish quality is generally not as high as wet polishing. OSHA requires specific engineering controls (HEPA vacuum or wet methods) for concrete grinding and polishing to control silica exposure (DeFusco Industrial Supply).
For dry polishing, use pads specifically designed for dry use—these often have vented or honeycomb patterns to improve airflow and heat dissipation. Standard wet pads used dry will overheat, glaze over, and fail prematurely.
Many professional contractors use a combination: dry grinding for the early, heavy-removal stages (with HEPA dust collection), then wet polishing for the finer grits to get the best possible finish. This gives you the convenience of dry prep with the quality of wet finishing.
| Pad Size | Best For | Typical Machine | Coverage Rate |
|---|---|---|---|
| 2" (50mm) | Detail work, inside corners, tight curves | Small angle grinder, rotary tool | Very slow—precision only |
| 3" (75mm) | Countertop edges, backsplash edges | 4.5" variable speed grinder | Edge-focused |
| 4" (100mm) | The standard—countertops, floors, edges | 4.5" or 5" variable speed grinder/polisher | Best all-around |
| 5" (125mm) | Large flat surfaces, production speed | 5" or 7" polisher | Production volume |
| 10"–20" | Floor grinders, walk-behind machines | Walk-behind floor grinder/polisher | Fast—large areas |
| 24"–30"+ | Ride-on / large planetary floor machines | Ride-on or large walk-behind | Very fast—industrial scale |
Sources: Diamond Pads Factory Selection Guide, AliExpress / SHDIATOOL
If you could only have one size, 4" (100mm) is the industry standard—it handles 90% of jobs from countertop faces to edges to small floors. For floor work, you'll want whatever size matches your floor grinder (Diamond Pads Factory).
Diamond polishing pads are a significant ongoing expense for any flooring or stone business. Getting maximum life from your pads directly improves your profit margin on every job. Here are proven techniques to extend pad lifespan.
This is #1 for a reason. Using the wrong bond hardness is the single biggest cause of premature pad failure. A bond that's too soft wears away too fast, wasting diamonds. A bond that's too hard glazes over and you end up pressing harder and running longer to get any cut, which still wears the pad but without productive cutting. Get the bond right, and everything else is optimization (DeFusco Industrial Supply).
Running pads at the right RPM is critical for both cutting efficiency and pad life. For resin bond polishing pads, the sweet spot is typically around 1500 RPM (AliExpress / SHDIATOOL). Running too fast generates excess heat that breaks down the resin bond prematurely. Running too slow doesn't give you efficient cutting and forces you to apply more pressure, which also wears pads faster.
Always check the manufacturer's recommended RPM range for the specific pads you're using. Different brands and bond types have different optimal speed ranges.
Applying steady, even pressure (15–20 lbs for handheld machines, or letting the machine's own weight do the work for walk-behind units) gives the best cutting action and longest pad life. Pressing too hard generates excess heat, causes uneven wear, and can glaze the pad surface. Too little pressure means the diamonds don't engage properly and you waste time with ineffective passes (AliExpress / SHDIATOOL).
For walk-behind floor grinders, the machine's weight provides the downward pressure. This is why machine weight and bond hardness must be matched—heavier machines wear bonds faster, so they need harder bonds.
Water is the single most effective way to extend pad life during polishing. It cools the pad and the surface, prevents glazing from heat buildup, and flushes away swarf that would otherwise clog the pad surface. In one contractor's testing, water cooling extended resin pad life by 20% compared to dry polishing on the same concrete (AliExpress / SHDIATOOL).
If you must work dry, make sure you're using pads specifically designed for dry polishing, with good heat dissipation features (vented patterns, thin profile), and keep an eye on pad temperature. If a pad gets too hot to touch, stop and let it cool.
Skipping grit stages doesn't just hurt finish quality—it also wears out your finer pads faster. If you jump from 100 grit to 800 grit, the 800 grit pad has to remove all the 100-grit scratches, which is way more material than it was designed for. The result: your 800 grit pads wear out in a fraction of their expected life, and you still don't get a good finish. Following the proper progression ensures each pad does the work it was designed for and lasts as long as possible (Diamond Pads Factory).
After each grit stage, rinse or clean your pads thoroughly before storing them. Embedded dust and debris can cause scratching when you reuse the pad, and dried slurry can harden on the pad surface, reducing cutting efficiency. For resin pads, rinse under running water and scrub gently with a soft brush. For metal bond discs, use a dressing stick or wire brush to clean the surface and break up glazing (AliExpress / SHDIATOOL).
If a metal bond pad glazes over (becomes shiny and stops cutting), you can "dress" it to restore cutting action. Use a dressing stick, a piece of abrasive block, or run the pad on a rough concrete surface to wear away the glazed layer and expose fresh diamonds. This won't fix a pad that's completely worn out, but it can extend the life of a partially glazed pad significantly.
Always overlap each pass by 25–50% of the grinding/polishing width. This ensures complete coverage and prevents streaks or "holidays" (missed spots). On multi-head planetary machines, this is built into the machine's action, but you still need to overlap your walking paths. For handheld work, conscious overlapping is critical for uniform results (Superfloor Australia).
Change the direction of your passes by 90 degrees between grit stages. If you ran north-south at 50 grit, run east-west at 100 grit. This cross-hatching pattern ensures that every scratch from the previous grit is removed by the current one. It also helps produce a more uniform, pattern-free finish (Superfloor Australia).
Walk-behind grinders can't get within 1–2 inches of walls, corners, or obstacles. You need a handheld edge grinder to do the perimeter and detail work. Use the same grit sequence on edges as you do on the main floor, and make sure the edge finish matches the floor finish perfectly. This is one place where many contractors cut corners and it shows (China Dimec, 2025).
Maintain a steady walking speed (3–4 meters per minute for coarse grinding, slightly faster for polishing) rather than rushing through areas that look "done." Uneven speed causes uneven material removal, which shows up as visible patterns in the polished floor. Professional operators develop a consistent rhythm that ensures uniform results across the entire floor (Superfloor Australia).
Stop and inspect frequently, especially when starting a new grit or working on a new area. Use raking light (side lighting) to check for scratch patterns. Run your hand over the surface to feel for texture differences. Don't assume everything is fine just because you've done your passes—check and verify. Catching a problem early saves hours of rework later.
| Problem | Possible Cause | Solution |
|---|---|---|
| Pad glazed over / not cutting | Bond too hard for material; insufficient water; overheating | Dress the pad to break glaze; switch to softer bond; increase water cooling; reduce speed |
| Pads wearing too fast | Bond too soft for material; too much pressure; too high RPM | Switch to harder bond; reduce pressure; lower RPM; verify concrete hardness |
| Swirl marks in finish | Skipping grit stages; improper overlap; pad contamination | Go back one grit and rework; ensure 50% overlap; clean pads thoroughly between grits |
| Uneven gloss / patchy appearance | Inconsistent pressure; uneven floor; varying concrete density | Maintain steady pressure; spend more time on lower areas; densify soft spots |
| Deep scratches visible in final polish | Previous grit not fully removed; contaminated pads; missed spots | Go back to the grit that produced the scratches and fully remove them; check pad cleanliness; rework missed areas |
| Pad burning / smell | Overheating from dry use, too much pressure, or too high speed | Use water cooling; reduce pressure; lower RPM; let pad cool between passes |
| Pad delaminating from backing | Excessive heat; cheap pad quality; wrong attachment system | Reduce heat buildup; upgrade to quality pads; verify backing compatibility |
| Orange peel texture | Too much pressure on soft stone; hard pads on uneven surface | Reduce pressure; use more flexible pads; ensure flat surface before polishing |
| Haze / cloudy finish | Incomplete densifier reaction; insufficient final polishing; dirty pads | Allow densifier full cure time; do additional passes at final grit; clean or replace pads |
Pad lifespan varies enormously depending on the material being polished, the bond hardness, the grit size, and the polishing method (wet vs. dry). As a very rough guideline, a set of resin bond polishing pads can cover several hundred square feet of granite countertop edges, while metal bond floor grinding discs might cover 200–300+ square meters of aggressive grinding before needing replacement (Blade Runner Diamond Tools, 2026). Coarse grit pads wear faster because they remove more material. Properly matched pads used with water cooling and correct technique will last significantly longer than mismatched pads used dry with excessive pressure. The best way to estimate pad cost is to calculate cost per square foot based on your own jobs, since every operation is different.
The biggest differences are diamond quality, diamond concentration, bond consistency, and backing quality. Premium pads use higher-grade industrial diamonds that are more uniform in size and shape, which produces more consistent cutting and longer life. They also have more precisely formulated bonds that wear at the correct rate for specific materials. Cheaper pads often have lower diamond concentration, irregular diamond shapes, inconsistent bond hardness, and poor-quality backings that delaminate or warp. The result is that cheap pads can actually cost more per square foot because they wear out faster and produce inferior finishes that require rework. At YUMEIGU, we manufacture our diamond polishing pads with consistent quality control and premium industrial diamonds, giving contractors reliable performance at competitive factory-direct prices.
While diamond pads work on both concrete and stone, the optimal pad for one isn't necessarily optimal for the other. Concrete is a complex, variable material that typically requires metal bond grinding followed by resin bond polishing. Stone (granite, marble, etc.) is more uniform and typically uses resin bond pads throughout (or starts with a coarser resin grit). The bond hardness also differs—concrete pads are formulated for cement and aggregate, while stone pads are formulated for specific stone types. For occasional use on both materials, a medium-bond resin pad set will work, but for professional results and efficiency, you should use pads specifically formulated for the material you're working on.
A standard concrete polishing sequence uses metal bond pads for coarse grinding (30–100/200 grit), then transitions to resin bond pads for honing and polishing (400–3000 grit). The most common professional sequence is: 30 grit metal → 100 grit metal → 400 grit resin → 800 grit resin → 1500 grit resin. For a more premium finish, add additional grits: 30 → 50 → 100 → 200 → 400 → 800 → 1500 → 3000 grit. For budget projects, a 3-step system (50 → 400 → 3000 grit) can work but won't achieve the same depth of gloss or scratch-free perfection (Diamond Pads Factory). Always inspect with raking light between stages to ensure the previous scratch pattern is fully removed before advancing.
You'll know it's time to change or replace a pad when: (1) the cutting rate drops noticeably and you have to make more passes to get the same result, (2) you can visually see that the diamond surface is worn down or the bond is depleted, (3) the pad develops a glazed or shiny surface and stops cutting effectively, (4) you start seeing inconsistent results or new scratch patterns from worn uneven pads. For resin pads, you'll typically see the working surface wear down until the diamonds are gone. For metal bond tools, you'll notice reduced aggressiveness and eventually see the metal segment height getting very low. Keep track of how many square feet each pad set covers on typical jobs—this gives you a reliable metric for budgeting and scheduling pad changes.
Wet polishing produces a higher-quality gloss finish, extends pad life by cooling and lubricating, and eliminates airborne silica dust. However, it creates slurry that must be managed and disposed of. Dry polishing is more convenient for on-site work and jobs without water access, but generates silica dust that requires HEPA filtration and respirators, and pads wear 30–60% faster due to heat buildup (Diamond Pads Factory). For most professional floor polishing, wet polishing is preferred when conditions allow. For quick touch-ups, outdoor work, or jobs without water, dry polishing with proper dust extraction is the practical choice. Many contractors use a hybrid approach: dry grinding for prep, wet polishing for finishing.
The rule is: hard material → soft bond; soft material → hard bond. Hard concrete or hard stone wears the bond slowly, so you need a softer bond to expose fresh diamonds as the old ones dull. Soft concrete or soft stone wears the bond quickly, so you need a harder bond to hold the diamonds longer and get full use out of them (DeFusco Industrial Supply). When in doubt, choose a softer bond—an overly hard pad will glaze over and stop cutting entirely, wasting time, while a slightly soft pad still cuts (you just go through pads faster). Test the material hardness with a scratch test or Mohs kit, and always test a small area first to verify your bond selection is correct.
Yes, diamond polishing pads can be used on standard low-speed floor machines (175 RPM buffers) if you have the right adapter plate and the pads are rated for that speed. However, low-speed machines won't give you the same cutting efficiency or finish quality as purpose-built high-speed polishers or planetary grinders. Floor buffers are better suited for maintenance polishing with very fine grit pads, not for heavy grinding or initial polishing. For serious concrete polishing work, a dedicated planetary or rotary floor grinder with variable speed control is the right tool. YUMEIGU diamond floor polishing pads are compatible with most major brands of floor grinders—check our spec sheets for exact compatibility information.
Diamond polishing pads are the unsung heroes of the concrete and stone finishing industry. The quality of your pads—their diamond concentration, bond formulation, and manufacturing consistency—directly determines the quality of your finished work and your profitability on every job. Buying the cheapest pads you can find is rarely the best strategy; what matters is cost per square foot of finished floor, not cost per pad.
The key principles from this guide are:
Ready to upgrade your diamond polishing pads? YUMEIGU manufactures professional-grade diamond grinding segments and resin polishing pads for concrete and stone applications. Our pads are engineered for consistent performance, long life, and excellent value—all at factory-direct pricing. We offer metal bond, resin bond, and hybrid/transitional pads in a full range of grits and sizes, with soft, medium, and hard bonds to match any material. With customers in 80+ countries, we have the expertise to help you select the right pads for your specific applications.
Contact our team at sales@yumeigu.com or call +86-13883996684 for personalized pad selection advice and competitive wholesale pricing. You can also explore our full range of diamond tools and flooring equipment at www.yumeigu.com and follow us on Facebook, LinkedIn, and YouTube (@yumeigutechnology) for more polishing tips, technique videos, and industry insights.
Get premium diamond tools and flooring machines from YUMEIGU. Factory direct pricing, global shipping.
Get a QuoteYUMEIGU provides one-stop industrial flooring materials & equipment, serving 80+ countries worldwide. Get a free project consultation & quote today.