Concrete floor grinding is the foundation of every polished concrete, epoxy coating, and floor resurfacing project. Do it right, and you'll achieve a flat, uniform surface with proper profile for maximum coating adhesion and a long-lasting finish. Do it wrong, and you're setting yourself up for coating failure, uneven surfaces, and costly rework. This step-by-step concrete floor grinding process guide walks you through every phase—from pre-job inspection and surface preparation through coarse grinding, honing, densification, polishing, and sealing. Whether you're a flooring contractor, facilities manager, or DIY enthusiast tackling a commercial project, understanding the complete concrete grinding process is essential for professional results.
1. What Is Concrete Floor Grinding and Why It Matters
Concrete floor grinding is a mechanical process that uses diamond-impregnated tools mounted on rotating or planetary floor grinding machines to abrade the concrete surface. The process progressively removes material from the top layer of the concrete slab, starting with coarse diamond segments for heavy material removal and progressing through finer grits to achieve a smooth, uniform, and optionally highly polished finish.
But grinding is about far more than just making concrete look nice. It serves several critical functional purposes:
- Surface leveling: Grinding removes high spots, trowel marks, and unevenness to create a flat floor plane.
- Surface profiling: Grinding creates the proper Concrete Surface Profile (CSP) required for coatings, adhesives, and toppings to bond properly.
- Coating removal: Grinding strips off old paint, epoxy, adhesives, and sealers to expose clean concrete.
- Stain and contamination removal: Grinding removes surface stains, oil deposits, and light chemical contamination.
- Polished concrete finish: Progressing through fine grits produces a durable, high-gloss polished concrete floor.
The importance of proper grinding cannot be overstated. Industry research shows that surface preparation determines approximately 60% or more of coating longevity (Nedis Floor, 2026). Skip or rush the grinding step, and you dramatically increase the risk of coating delamination, blistering, and premature floor failure. Conversely, a well-executed grinding process creates a mechanical profile that ensures maximum coating adhesion and a floor that will perform for years.
At YUMEIGU, we've supplied floor grinding equipment and diamond tooling to contractors in 80+ countries. We've seen firsthand how following a systematic grinding process separates successful, profitable projects from problem jobs. This guide distills that field experience into a clear, step-by-step process you can follow on every project.
2. Pre-Job Assessment: Inspect, Measure, and Plan
Before you wheel a single grinder onto the job site, you need to conduct a thorough pre-job assessment. Skipping this step is the number one cause of project delays, budget overruns, and unexpected problems.
Slab Condition Inspection
Walk the entire floor and document:
- Slab age: New concrete must cure at least 28 days before grinding. Green concrete (less than 7 days old) is too soft and will clog diamond tools.
- Surface hardness: Test with a Mohs hardness pick or scratch test. Concrete hardness ranges from Mohs 3 (soft, new or low-PSI mix) to Mohs 7+ (hard, high-PSI or aged concrete). This determines your bond selection.
- Existing coatings: Identify any paint, epoxy, sealer, adhesive, or other coatings on the surface. Note the type and approximate thickness.
- Stains and contamination: Mark oil stains, chemical spills, rust, and other contamination. Determine depth and whether grinding alone will remove them.
- Cracks and joints: Document all cracks, control joints, expansion joints, and spalled areas. These may need patching before grinding or special handling during the process.
- Flatness deviations: Use a straightedge or laser level to identify high spots, low spots, and waviness. This tells you how much material you need to remove.
- Moisture content: Test with a moisture meter or calcium chloride test. High moisture can affect coating adhesion and may indicate underlying slab issues.
Project Specifications
Clarify with the client or project spec:
- Target finish: Is this a grind-and-seal, a matte polish (400 grit), a semi-polish (800 grit), or a high-gloss polish (1500-3000+ grit)?
- Exposure level: Cream finish (very light grind, no aggregate exposed), salt-and-pepper (fine aggregate exposed), or full aggregate exposure?
- Coating type: If applying epoxy, polyurethane, or another coating, what CSP (Concrete Surface Profile) is required? Most epoxies need CSP 3-5 (Nedis Floor, 2026).
- Flatness requirements: What F-number or tolerance is specified?
Job Planning
Based on your assessment, plan:
- Equipment needed: What size grinder? Planetary or rotary? How many machines?
- Tooling requirements: What grit sequence? What bond hardness for the concrete?
- Time estimate: Calculate production rates. Coarse grinding typically covers 200-500 sq ft/hour per machine, while polishing can cover 500-1,000+ sq ft/hour.
- Dust control strategy: Wet grind or dry grind with HEPA vacuum?
- Logistics: Power supply, water source, waste disposal, access, and scheduling.
3. Surface Preparation: Cleaning and Degreasing
Surface preparation is the most important step in the entire process. Before you start grinding, the concrete must be thoroughly cleaned. Any dirt, oil, grease, or debris on the surface will interfere with grinding, clog your diamond tools, and potentially get pressed into the concrete pores.
The Pre-Grind Cleaning Process
Follow this systematic cleaning procedure (British Concrete Polishing):
- Clear the area completely: Remove all furniture, equipment, boxes, and debris. The entire floor surface should be exposed and accessible.
- Sweep thoroughly: Use a push broom or industrial sweeper to remove all loose dirt, dust, and debris.
- Inspect for oil and grease stains: Walk the floor marking every oil stain, grease spot, and chemical residue. Note size, type, and severity.
- Absorb fresh oil: For fresh oil spills, apply an absorbent (kitty litter, diatomaceous earth, or commercial oil absorber) and let it sit for 24-48 hours to draw out as much oil as possible.
- Apply degreaser: Apply a heavy-duty concrete degreaser or alkaline cleaner to all stained areas and the entire floor if contamination is widespread. Let it dwell according to the manufacturer's instructions—usually 15-30 minutes.
- Mechanical scrubbing: Use a floor buffer with a scrubbing pad or stiff bristle brush to agitate the degreaser and work it into the concrete pores. For heavy contamination, use a rotary scrubber with water.
- Rinse thoroughly: Pressure wash or wet vacuum the floor to remove all degreaser and dissolved contaminants. Change the water frequently until it runs clear.
- Dry completely: Allow the floor to dry thoroughly—at least 12-24 hours depending on temperature and humidity. Use fans or dehumidifiers to speed drying.
- Re-inspect: Once dry, check for any remaining stains. Repeat the cleaning process on stubborn spots if needed.
- Mask sensitive areas: Tape off walls, baseboards, drains, and any areas that should not be ground or that need protection from dust or slurry.
Why This Matters
Oil and grease are the enemies of both grinding and coating adhesion. If you grind over oil-contaminated concrete, the oil gets driven deeper into the slab, coating the diamond particles and reducing cutting efficiency. Worse, oil residue prevents coatings from bonding properly, leading to blistering and delamination down the line. In many cases, oil that penetrates deep into the concrete cannot be fully removed by grinding alone and may require special treatments or patching.
Remember the golden rule: surface preparation determines approximately 60% or more of coating longevity (Nedis Floor, 2026). Invest the time to do it right.
4. Equipment and Tooling Setup
Having the right equipment and tooling—and setting it up correctly—is essential for efficient, high-quality grinding.
Grinder Selection
The type and size of grinder depend on your project:
- Handheld angle grinders: For edges, corners, and small touch-up areas. Use 7-9 inch models with diamond cup wheels.
- Walk-behind single-disc grinders (18-22 inch): Best for residential garages, small retail spaces, and tight quarters. Good for coating removal and light grinding.
- Planetary grinders (20-30 inch): The workhorse of commercial and industrial concrete grinding. Three or four counter-rotating heads produce a flat, swirl-free finish. Ideal for medium to large projects.
- Ride-on grinders (32+ inch): For large industrial floors, warehouses, and distribution centers where speed is critical.
For most commercial and industrial projects, planetary grinders are the preferred choice because they produce flatter results with more consistent scratch patterns compared to single-disc rotary machines (Niagara Machine, 2025).
Tooling Selection: The Critical Bond Match
Choosing the right diamond tooling is the most important decision for grinding efficiency. The key principle is counterintuitive but essential:
- Hard concrete → soft bond diamond tools
- Soft concrete → hard bond diamond tools
This is the most common beginner mistake. Here's why it works: soft bonds wear away faster, continuously exposing fresh diamond particles needed to cut hard concrete. Hard bonds wear slowly, holding the diamonds in place longer when cutting abrasive soft concrete. Get this pairing wrong and your grinding cups glaze over or disintegrate in minutes (DeFusco Industrial Supply).
Recommended Tooling by Grit Stage
| Stage | Grit Range | Tool Type | Purpose |
|---|
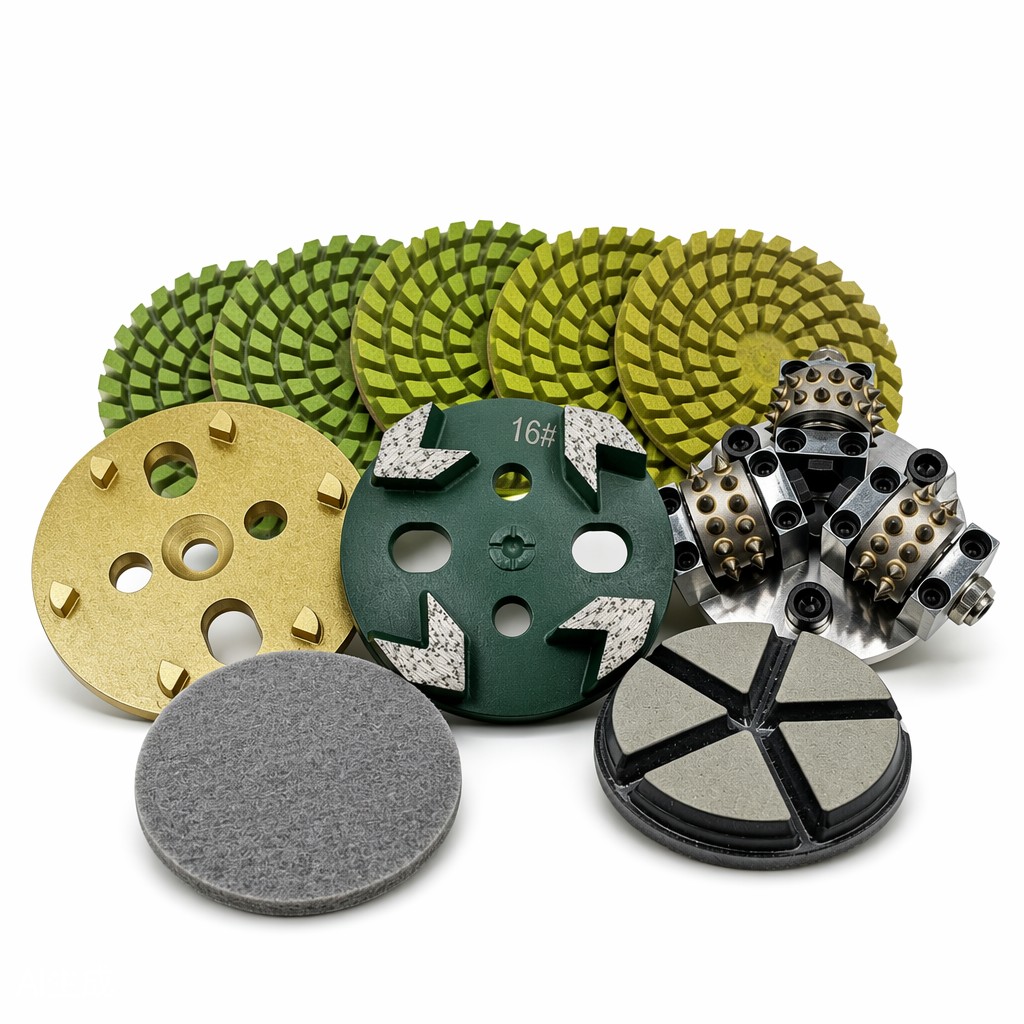
| Coarse Grind | 16, 30, 50 grit | Metal bond segments, PCD tools | Leveling, coating removal, aggregate exposure |
| Medium Grind | 80, 100, 120 grit | Metal bond segments | Refining scratch pattern, final profile |
| Honing | 200, 400 grit | Transition/resin bond | Smoothing, densifier prep |
| Polishing | 800, 1500, 3000 grit | Resin bond pads | Gloss development, final finish |
At YUMEIGU, we recommend starting with a test patch in an inconspicuous area to verify your bond selection and grit sequence before proceeding across the entire floor. Every slab is different, and field testing always beats guesswork.
Additional Equipment
- HEPA dust collector: Essential for dry grinding to meet OSHA silica requirements.
- Edge grinder: For grinding right up to walls and obstacles.
- Diamond cup wheels: For handheld grinders and edge work.
- Floor scraper: For removing thick coatings and adhesives before grinding.
- Measuring tools: Moisture meter, hardness tester, straightedge, tape measure.
- Personal protective equipment: Respirator, safety glasses, ear protection, gloves, steel-toe boots.
5. Safety First: Dust Control and PPE
Concrete grinding generates crystalline silica dust, which is classified as a human carcinogen. OSHA regulates silica exposure under 29 CFR 1926.1153, and compliance is not optional (DeFusco Industrial Supply).
Dust Control Methods
You have two primary options for controlling dust:
Dry grinding with HEPA vacuum:
- Use a grinder with a fully enclosed shroud connected to a HEPA-rated dust collector.
- The vacuum must provide sufficient airflow (typically 150+ CFM per grinder head).
- Inspect and clean filters regularly.
- Use in combination with respiratory protection.
Wet grinding:
- Water suppresses dust by turning it into slurry.
- Requires a water source and slurry management/disposal.
- Generally faster cutting than dry grinding because water cools the diamonds.
- Creates a mess and requires wet vacuuming and drying time.
At minimum, use wet grinding methods or a HEPA-rated vacuum attached directly to your grinder. For maximum protection, combine engineering controls with respiratory PPE (DeFusco Industrial Supply).
Required Personal Protective Equipment
- Respiratory protection: N95 respirator minimum; P100 or supplied-air for high-dust environments.
- Eye protection: Safety glasses or goggles to prevent flying debris and dust.
- Hearing protection: Earplugs or earmuffs—floor grinders produce 90+ dB of noise.
- Hand protection: Work gloves for handling tools and materials.
- Foot protection: Steel-toe boots with non-slip soles.
- Protective clothing: Long sleeves and pants to protect from dust and slurry.
Additional Safety Considerations
- Ensure electrical safety—GFCI protection for all power tools, especially when wet grinding.
- Post warning signs and restrict access to the work area.
- Ensure proper ventilation in enclosed spaces.
- Have an emergency eyewash station available.
- Follow lockout/tagout procedures when servicing equipment.
- Dispose of slurry and dust properly—don't wash slurry down storm drains.
6. Coarse Grinding: Leveling and Profiling
Coarse grinding is the most aggressive phase of the process and typically the most time-consuming. This is where you remove the most material, level the floor, and create the base profile for everything that follows.
What Coarse Grinding Accomplishes
- Removes existing coatings, adhesives, and sealers
- Levels high spots and flattens uneven areas
- Opens up the concrete surface and exposes aggregate (if specified)
- Creates the initial scratch pattern that subsequent grits will refine
- Removes surface stains and light contamination
The Coarse Grinding Process
- Start with the appropriate grit: Begin with 16 or 30 grit metal bond segments for heavy removal, or 50 grit for lighter work. The starting grit depends on how much material you need to remove and the condition of the floor.
- Work in sections: Divide the floor into manageable sections (usually 200-500 sq ft). Work systematically from one end of the space to the other.
- First pass: Make your first pass in one direction (e.g., north-south). Maintain a steady forward speed of 3-4 meters per minute maximum during coarse phases (Superfloor Australia). Going too fast leaves tool marks and inconsistent results.
- Second pass: Make a second pass perpendicular to the first (e.g., east-west). This cross-hatching pattern ensures uniform coverage and helps eliminate directional patterns.
- Overlap properly: Overlap each pass by 2-4 inches to prevent missed strips.
- Check progress frequently: Stop periodically to inspect the surface. You should see a consistent scratch pattern across the entire section. If some areas are untouched, you may need more passes or the floor is uneven.
- Edge work: Use an edge grinder or handheld grinder to grind right up to walls, columns, and obstacles. Match the grit and depth of the main floor grinding.
- Clean between grits: After completing a grit stage, thoroughly clean the floor (sweep, vacuum, or wet vacuum) before moving to the next grit. This prevents leftover coarse grit particles from scratching the floor during finer stages.
Speed and Pressure Guidelines
Maintaining proper speed and pressure is critical for both tool life and finish quality:
- Forward speed: 3-4 meters per minute maximum for coarse grinding. Faster speeds reduce material removal per pass and can cause uneven results.
- Machine weight: Use the machine's own weight—don't add excessive downward pressure. Most grinders are designed to work with their own weight providing adequate pressure.
- Excessive pressure warning: Applying too much down pressure causes diamond segments to show burn marks, glazes over the diamond tips, and can damage the machine's gears and bearings.
Pro tip from YUMEIGU: If you're seeing sparking, smell burning, or notice the diamonds getting shiny and rounded (glazing), you're either moving too slow, applying too much pressure, or using the wrong bond hardness. Slow down, lighten up, or switch to a softer bond.
PCD Tools for Heavy Coating Removal
For removing thick coatings (epoxy, urethane, thick adhesives), Polycrystalline Diamond (PCD) tools are more effective than conventional diamond segments. PCDs have large, flat diamond faces that scrape off coatings without loading up. Use them for the initial coating removal pass, then switch to standard diamond segments for profiling the concrete underneath.
7. Medium Grinding: Refining the Surface
After coarse grinding establishes the flatness and profile, medium grinding refines the scratch pattern and prepares the surface for honing and polishing. This stage bridges the gap between aggressive material removal and fine finishing.
What Medium Grinding Accomplishes
- Refines the deep coarse scratches into a finer, more uniform pattern
- Further flattens the surface by removing remaining high spots
- Ensures all areas have consistent texture and profile
- Prepares the surface for subsequent honing and polishing stages
Grit Progression
Move through the medium grits in sequence: 80 grit → 100 grit → 120 grit (or equivalent). Each finer grit removes the scratches left by the previous coarser grit. Don't skip grits—skipping from 50 grit directly to 200 grit will leave deep 50-grit scratches that you'll never remove without going back.
The number of passes at each grit depends on:
- Concrete hardness and abrasiveness
- Depth of previous scratches
- Desired uniformity
- Tool bond aggressiveness
Typically, two passes (cross-hatch pattern) at each grit is sufficient, but very hard concrete or deep scratches may require more.
Medium Grinding Technique
- Start with 80 grit metal bond: This is the first medium grit after coarse grinding. Make two passes in a cross-hatch pattern.
- Inspect after each grit: After completing 80 grit, clean the floor thoroughly and inspect. The scratch pattern should be visibly finer than 30/50 grit, and all deep coarse scratches should be gone.
- Progress to 100 grit: Same cross-hatch technique. The floor will start to feel noticeably smoother.
- Finish with 120 grit: This is typically the final metal bond grit before moving to transition or resin bond tools.
- Fill joints and cracks (if needed): After 100-120 grit is a good time to fill control joints and cracks with joint filler or epoxy patching compound. The filled areas will be ground flush in subsequent passes.
Surface Profile Verification
By the end of medium grinding, you should verify that you've achieved the correct Concrete Surface Profile (CSP) for your intended coating. Most epoxy coatings require CSP 3 to 5 for proper adhesion (Nedis Floor, 2026). You can compare your surface to CSP reference chips or use a surface profile gauge.
If you're doing a grind-and-seal (no polishing), 100-120 grit is typically the stopping point. If you're moving on to honing and polishing, continue to the next stages.
8. Honing: Smoothing and Preparing for Polish
Honing is the transition stage between grinding and polishing. It further smooths the surface, refines the scratch pattern to the point where light reflection begins to appear, and prepares the concrete for densifier application.
What Honing Accomplishes
- Removes all metal bond scratch patterns
- Creates a smooth, uniform base for polishing
- Opens up the concrete pores for optimal densifier penetration
- Develops the initial sheen and reflection
Honing Grits and Tool Types
Honing typically uses 200 and 400 grit tools. These may be:
- Hybrid/transition bonds: Semi-metal, semi-resin bonds that bridge the gap between metal and resin tooling
- Resin bond pads: 200 and 400 grit resin pads for finer honing
- Ceramic bond: Some systems use ceramic bonded tools for honing stages
The Honing Process
- 200 grit pass: After finishing 100-120 grit metal bond, switch to 200 grit transition or resin tools. Make two cross-hatch passes. The floor will start to develop a low sheen when dry.
- Clean thoroughly: Between 200 and 400 grit, clean the floor very well. Any leftover coarse grit particles will cause deep scratches in the softer resin pads.
- 400 grit pass: Switch to 400 grit resin pads. Make two cross-hatch passes. At this point, the floor should have a noticeable matte sheen and reflect some light. The surface will feel very smooth to the touch.
- Inspect for scratch patterns: After 400 grit, inspect the floor carefully under good lighting. Look for any remaining deep scratches, swirl marks, or uneven areas. If found, you may need to go back a grit or two and rework those areas.
Why 400 Grit Is the Densifier Sweet Spot
400 grit is generally the ideal point to apply concrete densifier. Here's why:
- The concrete pores are open enough for the densifier to penetrate deeply
- You've removed all the coarse, deep scratches that would show through a polished finish
- The surface is smooth enough that you can begin to evaluate uniformity
- The densifier will have time to react and harden the surface before fine polishing
Applying densifier too early (at 100 grit or coarser) can result in a soft surface layer that clogs polishing pads. Applying it too late (after 800 grit) means it can't penetrate as effectively, and you'll need to re-polish after it cures.
9. Densifier Application: Hardening the Surface
Concrete densifier (also called hardener or sealer-hardener) is a chemical treatment that penetrates the concrete surface and reacts with the free lime (calcium hydroxide) in the concrete to form additional calcium silicate hydrate (CSH)—the same compound that gives concrete its strength. The result is a harder, denser, more durable surface that takes and holds a polish better than untreated concrete.
What Densifier Does
- Hardens the surface: Increases surface hardness by 30-50%, reducing dusting and wear
- Densifies the concrete: Fills pores and capillaries, making the surface less porous and more stain-resistant
- Improves polishability: Denser concrete takes and holds a higher gloss finish
- Reduces dusting: Eliminates the fine concrete dust that untreated floors generate
- Enhances durability: Creates a harder surface that resists abrasion and impact
Types of Densifiers
| Type | Chemistry | Characteristics |
|---|
| Sodium Silicate | Na₂SiO₃ | Traditional, economical, effective, high pH |
| Lithium Silicate | Li₂SiO₃ | Penetrates deeper, faster reaction, less whitening, premium cost |
| Potassium Silicate | K₂SiO₃ | Deep penetration, good for dense concrete, mid-range cost |
| Colloidal Silica | Nano-SiO₂ | Very fine particles, deep penetration, fast curing, premium |
Application Process
- Ensure the floor is clean and dry: The concrete must be clean of all grinding dust, dirt, and curing compounds. Damp but not wet is acceptable for some products—check the manufacturer's instructions.
- Mix the densifier: Follow the manufacturer's mixing instructions. Some products are ready-to-use; others require dilution.
- Apply evenly: Use a low-pressure sprayer, mop, or microfiber applicator to apply the densifier evenly across the entire floor. Don't let it pool or dry in spots.
- Maintain wet contact time: The densifier needs to stay wet on the surface for 15-30 minutes (check product instructions) to penetrate properly. If it starts to dry in spots, apply more densifier or spread the wet material around with a broom or mop.
- Remove excess: After the recommended contact time, remove any unabsorbed densifier by rinsing with clean water and wet vacuuming. Allowing densifier to dry on the surface can cause white residue (efflorescence) that's difficult to remove.
- Allow cure time: Let the densifier cure according to the manufacturer's instructions—typically 4-24 hours, depending on the product and conditions. Some products require multiple coats.
Standard practice is to apply concrete densifier after the 400 grit stage, allowing it to fully cure before proceeding to higher grit polishing (Superfloor Australia).
10. Polishing: Achieving the Desired Gloss
Polishing is where the transformation happens. Using progressively finer resin bond diamond pads, you refine the surface to produce a smooth, reflective, glossy finish. This is the stage that turns a gray concrete slab into a polished concrete floor.
Polishing Grit Progression
The grit sequence for polishing follows a logical progression. Each finer grit removes the scratches from the previous grit and produces a smoother, glossier surface:
| Grit | Finish Level | Appearance | Typical Use |
|---|
| 400 grit | Honed / Matte | Smooth, low sheen, minimal reflection | Industrial floors, matte finish |
| 800 grit | Semi-polish | Moderate gloss, clear reflections | Retail, commercial floors |
| 1500 grit | Polished | High gloss, sharp reflections | Showrooms, high-end retail |
| 3000+ grit | Mirror finish | Near-mirror gloss, very sharp reflections | Luxury retail, museum quality |
The Polishing Process
- Start with 800 grit resin pads: After densifier has cured and you've completed 400 grit honing, switch to 800 grit resin polishing pads. Make two cross-hatch passes. You'll see a dramatic increase in gloss compared to 400 grit.
- Clean between grits: Always thoroughly clean the floor between polishing stages. Even tiny particles can cause scratches in the soft resin pads.
- Progress to 1500 grit: Two more cross-hatch passes at 1500 grit. The floor will now have a clear, glossy reflection. You should be able to see overhead lights reflected clearly.
- Finish with 3000 grit (if specified): For a mirror-gloss finish, do two passes at 3000 grit. This produces an extremely high gloss, almost glass-like appearance.
- Burnish with a 3000+ grit pad: Some contractors do a final burnishing pass with a very high grit pad (3000-6000 grit) under high speed to maximize gloss.
Polishing Tips for Best Results
- Keep pads clean: Periodically rinse or brush off polishing pads to remove accumulated slurry and dust. Clogged pads don't cut effectively and can cause uneven results.
- Maintain consistent speed: Polishing should be done at a steady, moderate pace. Rushing leaves swirl marks; going too slow wastes time and wears pads unnecessarily.
- Use proper machine speed: Most polishing is done at 1500-1800 RPM for planetary machines. Check the pad manufacturer's recommendations.
- Work in sections: Complete one section from start to finish before moving to the next to maintain consistency.
- Lighting matters: Good overhead lighting helps you see the scratch pattern and identify missed spots. If you can't see it, you can't fix it.
11. Sealing and Final Finish
The final step in the concrete grinding and polishing process is applying a sealer or guard to protect the surface and enhance the finish. While densified polished concrete is relatively stain-resistant compared to raw concrete, it's still porous and can stain from oil, acid, and dyes.
Types of Sealers
| Sealer Type | Appearance | Protection Level | Maintenance |
|---|
| Penetrating sealer | Natural, no sheen change | Moderate stain resistance | Reapply every 3-5 years |
| Polyurethane guard | Slight sheen enhancement | High stain, chemical, and abrasion resistance | Reapply every 2-3 years |
| Epoxy sealer | Gloss or satin finish | Very high protection | 5-10 year life, can be recoated |
| Wax finish | Enhanced gloss, sacrificial layer | Low-moderate protection | Reapply every 6-12 months |
Sealer Application
- Final cleaning: Thoroughly clean the polished floor. Use a microfiber mop with a neutral pH cleaner. The floor must be completely clean and dust-free.
- Apply sealer: Follow the manufacturer's instructions. Most sealers are applied with a microfiber mop or sprayer and back-burnished into the surface.
- Allow to cure: Let the sealer cure according to the manufacturer's instructions—typically 4-24 hours for foot traffic, longer for heavy traffic.
- Buff/polish: After the sealer cures, do a final buff with a high-speed burnisher and a polishing pad or diamond impregnated pad to enhance gloss.
Final Inspection
Before you call the job complete, do a thorough final walkthrough:
- Gloss uniformity: Check that the gloss level is consistent across the entire floor. No dull spots or uneven areas.
- Scratch check: Inspect under bright light from different angles for any deep scratches or swirl marks.
- Edge quality: Verify that edges and corners match the main floor in finish quality.
- Joint condition: Check that joints and cracks are properly filled and flush.
- Coverage: Make sure you didn't miss any areas.
- Cleanliness: Remove all dust, debris, and equipment from the site.
12. Advanced: Premium Polished Concrete Process
For high-end projects requiring the absolute best finish and longest service life, premium polished concrete systems like the Husqvarna HiPERFLOOR process represent the gold standard. These multi-step processes combine advanced tooling, chemistry, and technique to produce floors with exceptional clarity, gloss, and durability.
The Premium Polished Concrete Sequence
A typical premium polished concrete process follows this detailed sequence (Husqvarna / YRCO, 2021):
- Coarse grind - 20/30 grit metal bond: Initial leveling and aggregate exposure
- 50 grit metal bond: Refine coarse scratches
- 100 grit metal bond + grouting: Final metal bond stage; apply grout filler to fill pinholes and imperfections
- Densifier application: Apply premium densifier (e.g., Hiperhard) after 100 grit metal bond
- 50 grit resin: First resin bond stage, removes metal bond scratches
- 100 grit resin: Further refinement
- 200 grit resin: Honing stage
- 400 grit resin: End of honing, beginning of true polish
- 800 grit resin: First polish stage
- 1500 grit resin: High gloss stage
- 3000 grit resin: Final polish, maximum gloss and clarity
- Guard/sealer application: Protective top coat
- Final burnish: High-speed burnishing for maximum clarity
What Makes Premium Process Different
- More grit stages: Standard polishing might skip some intermediate grits; premium hits every stage for scratch-free clarity.
- Grouting step: Filling pinholes and micro-porosity creates a denser, more uniform surface.
- Premium densifiers: Higher-quality chemistry for harder, denser concrete.
- Higher final grits: Going to 3000+ grit produces clarity you can't achieve at 1500 grit.
- Guard system: Premium guard products provide better stain resistance and longer service life.
How YUMEIGU Equipment Supports Premium Results
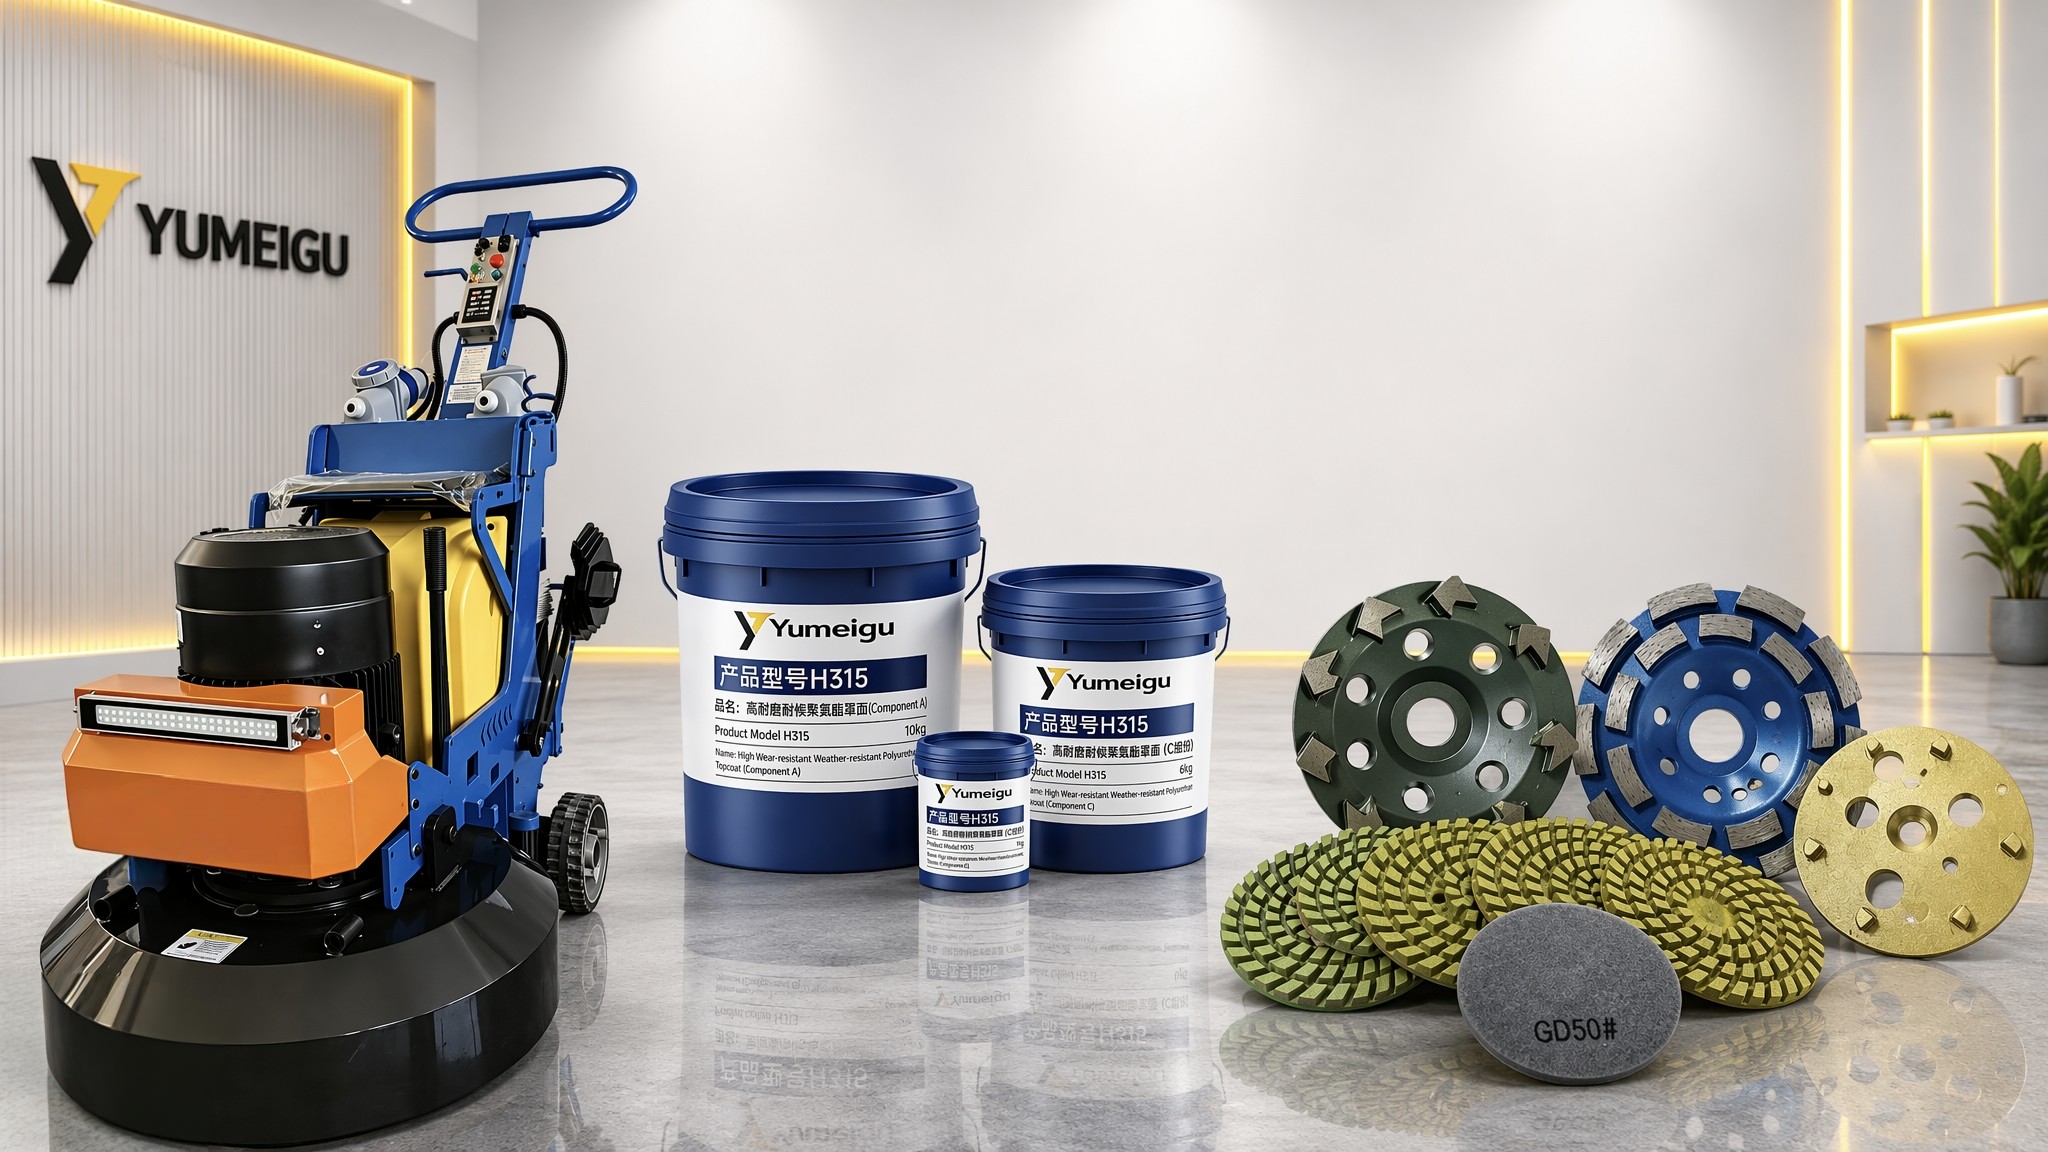
YUMEIGU floor grinders and diamond tooling are designed to deliver premium polished concrete results. Our planetary grinders provide the consistent, flat cut needed for uniform high-gloss finishes, and our diamond pads—available in the full range from 30 grit metal bond to 3000 grit resin—are engineered for consistent cutting and long life. Whether you're doing basic grind-and-seal or premium high-gloss polished concrete, having reliable, well-built equipment and quality tooling makes all the difference in the final result.
Frequently Asked Questions
Q: How long does it take to grind a concrete floor?
The time depends on the floor size, condition, and desired finish. A 1,000 sq ft residential floor might take 2-3 days for full polish. A 10,000 sq ft commercial floor typically takes 1-2 weeks for a complete grind-and-polish process. Coarse grinding is the slowest phase (200-500 sq ft/hr per machine), while polishing is faster (500-1,000+ sq ft/hr).
Q: Can you grind concrete without producing dust?
You can't eliminate dust entirely, but you can control it to safe levels. Dry grinding with a HEPA-rated dust collector attached directly to the grinder captures 99%+ of dust and meets OSHA silica requirements. Wet grinding eliminates airborne dust entirely but creates slurry that must be managed and properly disposed of. Most professional contractors use dry grinding with HEPA vacuums for cleaner, more efficient work (DeFusco Industrial Supply).
Q: How much concrete does grinding remove?
It depends on the starting condition and target finish. A light grind to open the surface might remove only 1/32 to 1/16 of an inch. Full aggregate exposure requires removing 1/8 to 1/4 inch or more. Leveling a severely uneven floor could remove even more. Each grit pass removes microscopic amounts of material—it's the cumulative effect of multiple passes at multiple grits that adds up to visible material removal.
Q: What is the difference between grinding and polishing concrete?
Grinding uses coarse metal-bond diamond tools (16-120 grit) to remove material, level the surface, and create profile. Polishing uses fine resin-bond diamond pads (200-3000+ grit) to smooth and refine the surface to a glossy finish. Grinding is about removal and shaping; polishing is about refinement and shine. The full process includes both, transitioning from grinding through honing to polishing.
Q: Do I need to apply a densifier?
For polished concrete floors, yes—densifier is highly recommended and usually considered essential. Densifier hardens the concrete surface, reduces dusting, improves stain resistance, and helps the concrete take and hold a polish. Without densifier, polished concrete tends to be softer, dustier, and loses its gloss faster. Grind-and-seal floors (non-polished) may or may not need densifier depending on the concrete quality and intended use.
Q: How do I know which diamond bond to use?
The rule of thumb is: hard concrete = soft bond, soft concrete = hard bond. Test the concrete's hardness with a Mohs pick or scratch test, then select a bond that matches. Most diamond tool suppliers provide bond selection charts. When in doubt, start with a medium bond and do a test patch. If the diamonds glaze over and stop cutting, you need a softer bond. If the tool wears extremely fast, you need a harder bond (DeFusco Industrial Supply).
Q: Can I grind over old epoxy or paint?
Yes, but you need the right approach. Thick coatings are best removed first with PCD tools or a floor scraper, then follow with standard diamond grinding to profile the concrete underneath. Grinding directly over coatings with standard diamond segments can cause the coating to melt and load up the diamonds, reducing cutting efficiency. Always work in a well-ventilated area and be aware of potential fumes from heated coatings.
Q: How long will a polished concrete floor last?
A properly installed and maintained polished concrete floor can last 20+ years—often the lifetime of the building. The concrete itself is the wear surface, so it's extremely durable. The gloss level will gradually diminish with heavy traffic, but the floor can be restored to like-new condition with periodic re-polishing and re-sealing, typically every 3-10 years depending on traffic.
Final Thoughts and Recommendations
The concrete floor grinding process is a systematic progression from coarse to fine, from aggressive material removal to glossy refinement. Each stage builds on the previous one, and skipping steps or rushing through phases always shows up in the final result. The key to a great grinding job is thorough preparation, the right equipment and tooling, proper technique, and patience to work through each grit stage completely.
Whether you're doing a basic grind-and-seal for an epoxy coating or a full 3000-grit polished concrete floor, the principles are the same: start with a clean slab, match your tooling to the concrete, progress methodically through the grits, and don't cut corners on surface preparation or densification. Remember that surface preparation alone determines more than 60% of your floor's long-term performance (Nedis Floor, 2026).
If you're looking for reliable floor grinding equipment and diamond tooling that deliver consistent results job after job, YUMEIGU offers a complete line of planetary floor grinders, diamond polishing pads, metal bond grinding segments, and accessories. Our equipment is used by flooring contractors in 80+ countries and is backed by our technical support team. We can help you select the right grinder size, diamond tooling package, and grit sequence for your specific project needs.
Ready to upgrade your grinding setup or stock up on diamond tooling? Contact YUMEIGU today at sales@yumeigu.com or visit www.yumeigu.com to explore our full product range. Our team of concrete flooring specialists can help you choose the right equipment and consumables for your projects. Follow us on Facebook, LinkedIn, Instagram, YouTube, and TikTok (@yumeigutechnology) for more flooring tips, product demos, and project showcases.